How to create and send cards in bulk

If you're looking to upload a CSV or Excel spreadsheet with names then you are in the right place.
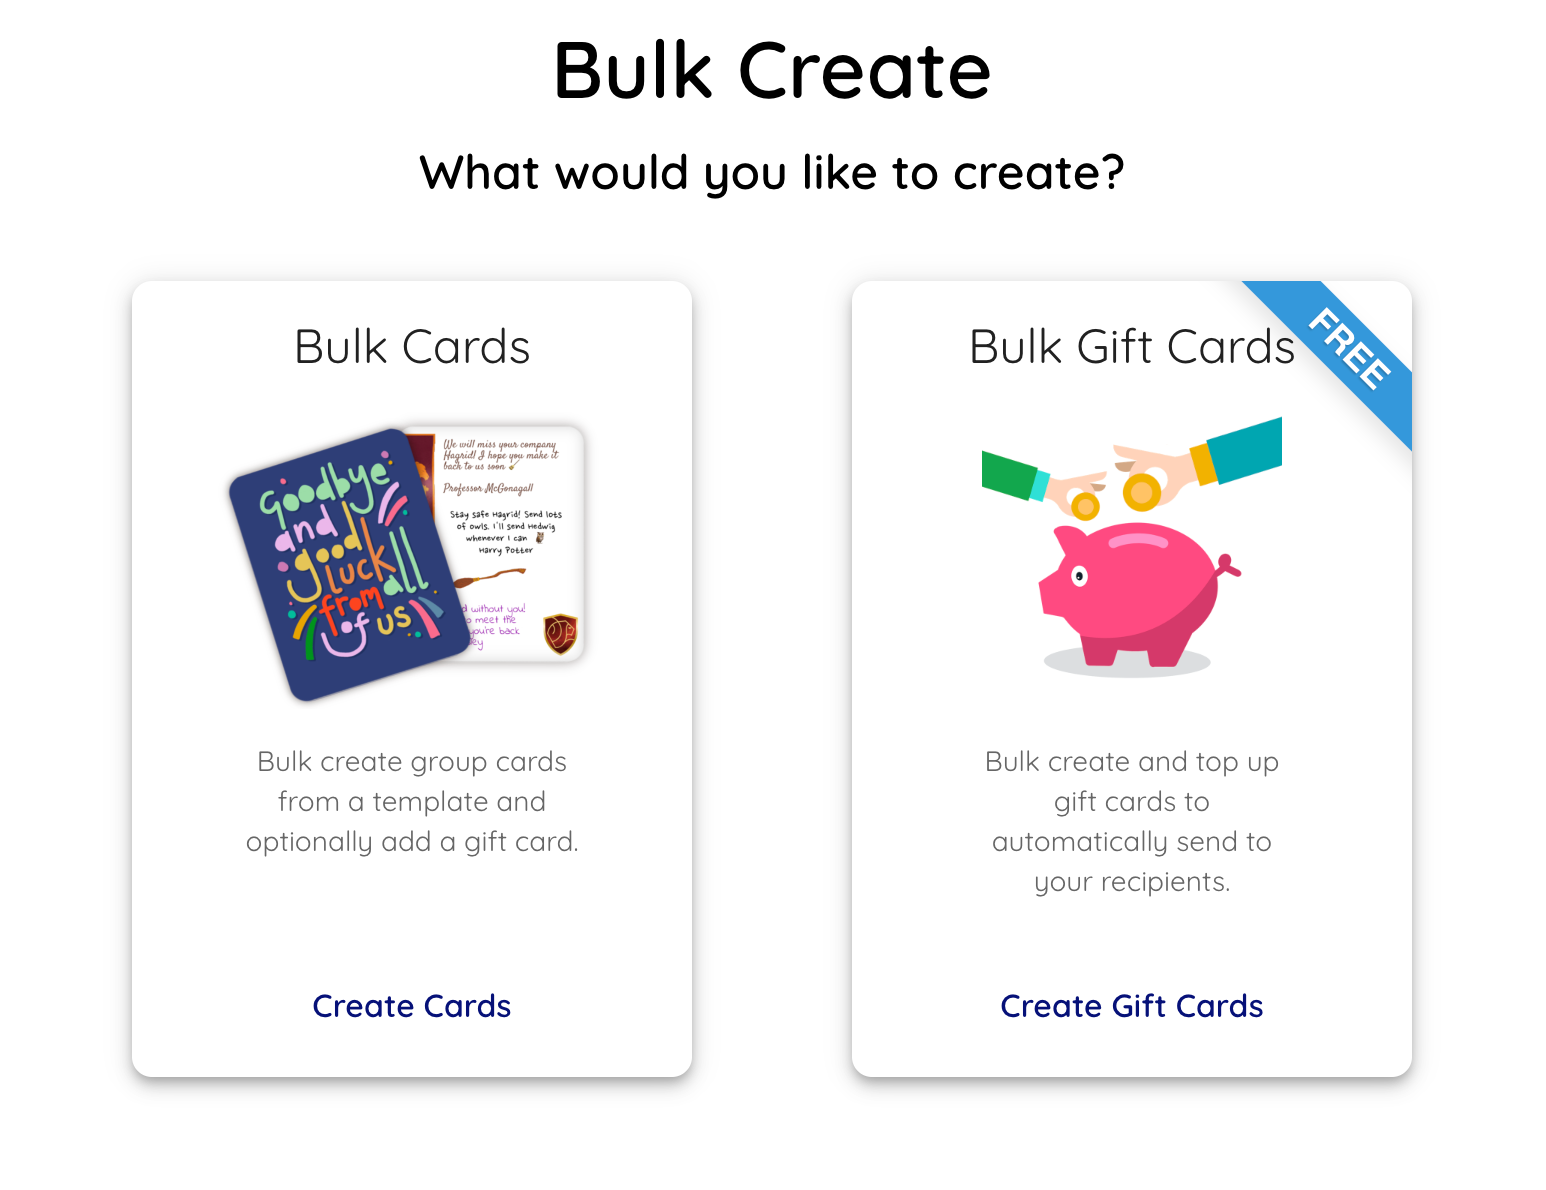
1. Create a new batch
Go to https://groupcards.app/batch/create and choose between a batch of cards (and optionally gift cards) or just gift cards.
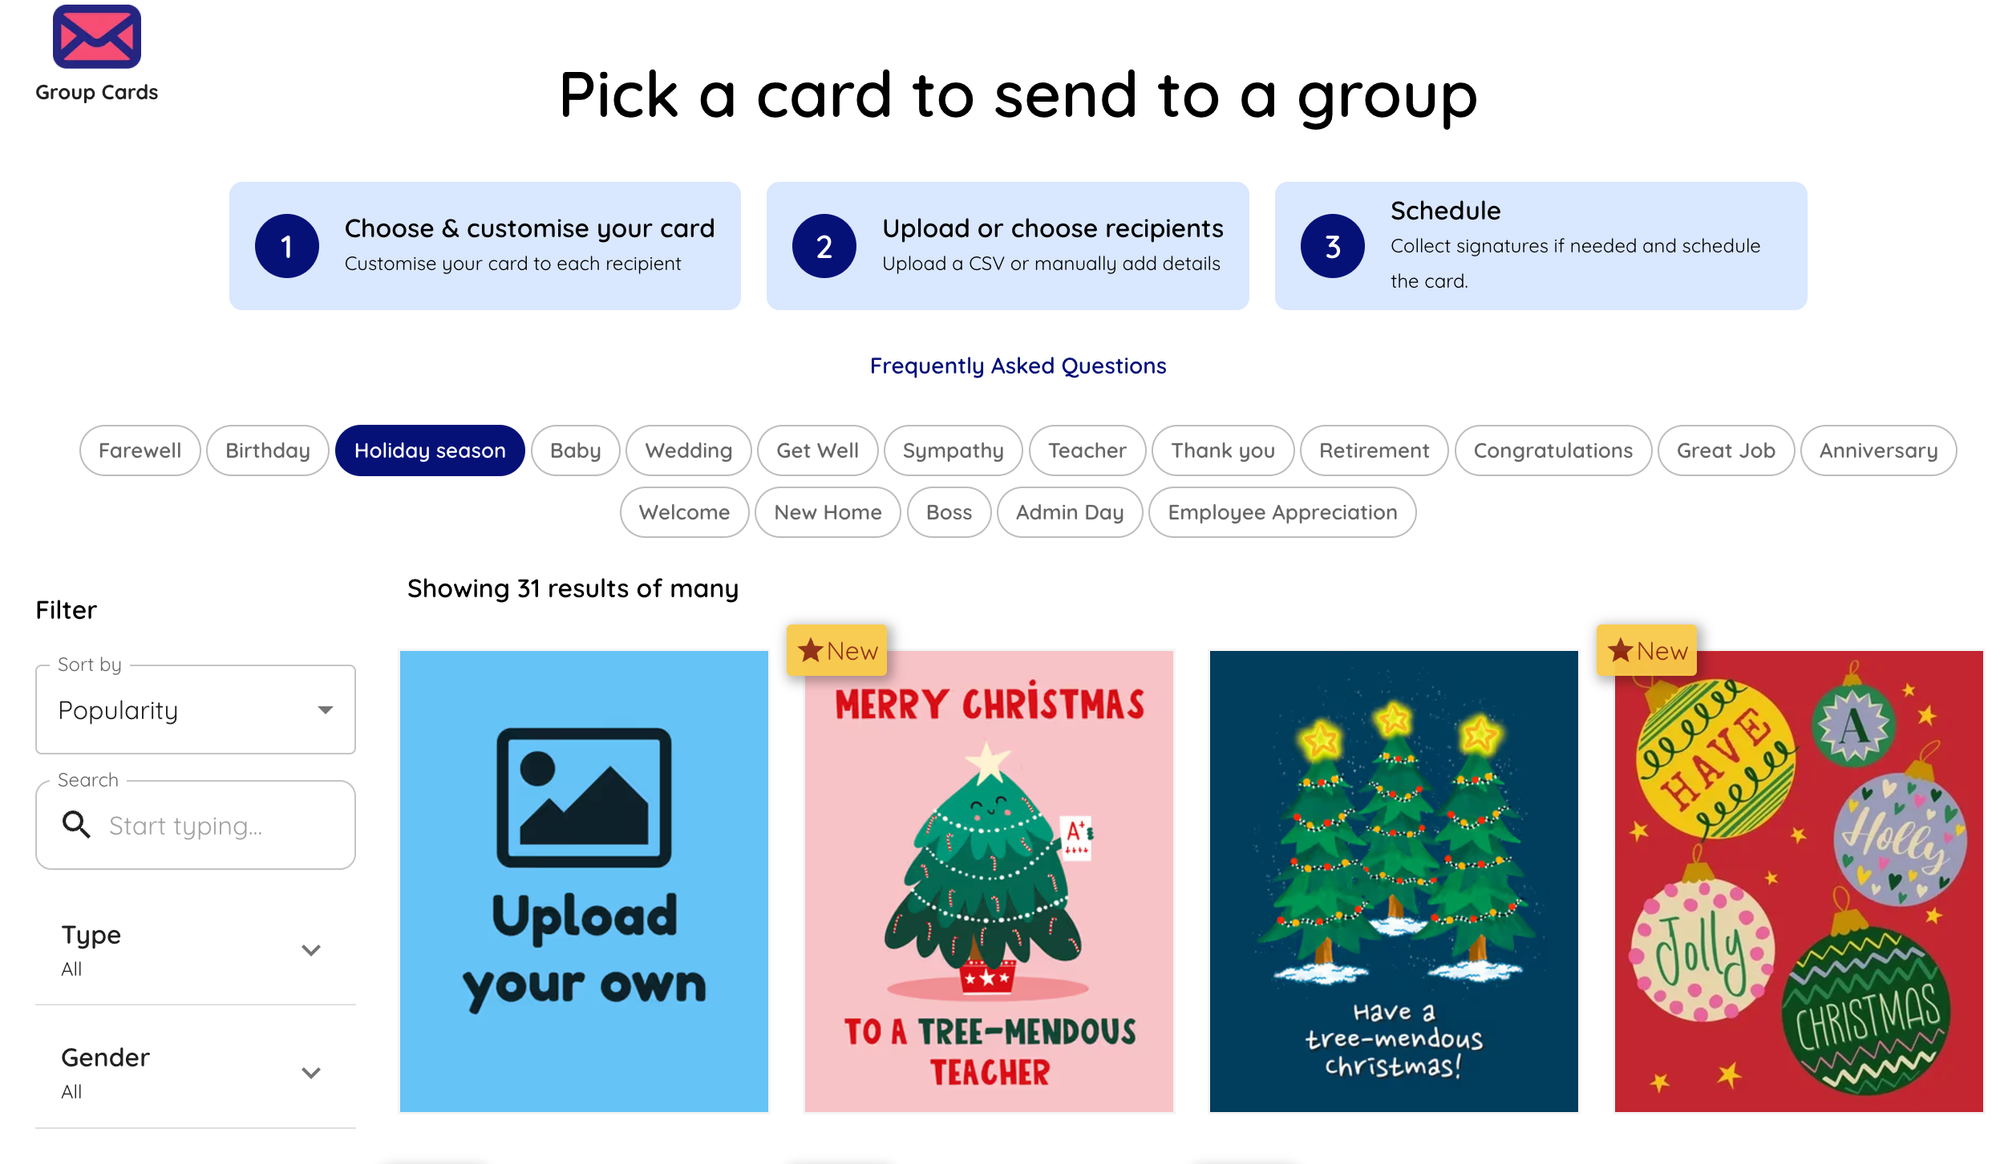
2. Pick a Design
If you selected to send greeting cards, pick a design to start with or upload your own.
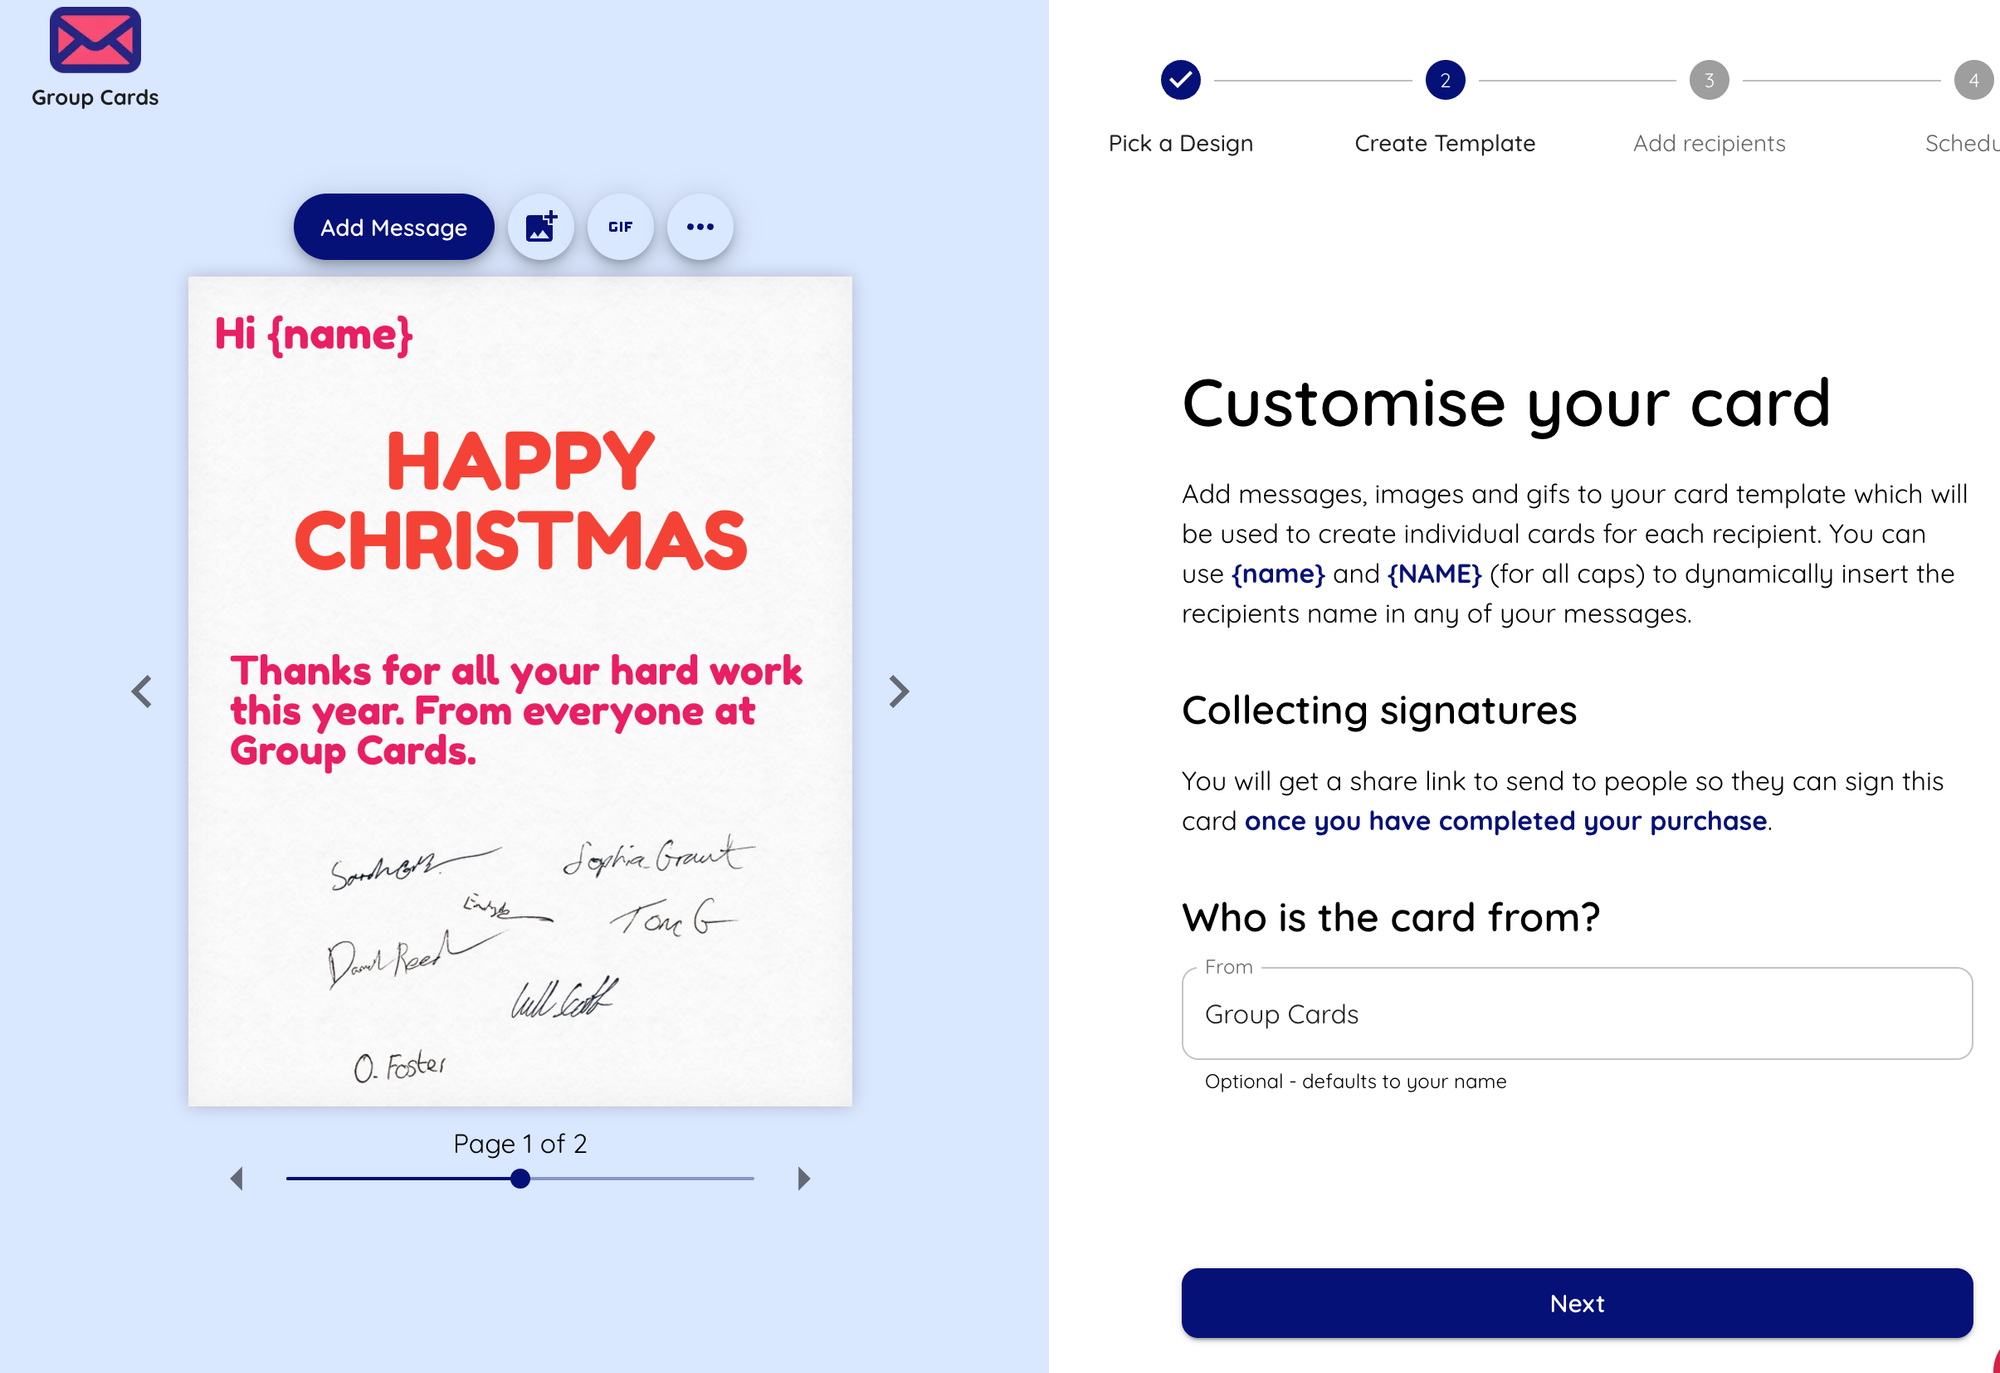
3. Customise your template card
4. Add recipients
Click on the Continue to add Recipients button then on this page download the CSV template by clicking on the link.
Without editing the header row, copy in the list of recipients you want to send your cards to along with a delivery date (and optional time). Don't worry about the timezone as you can review and bulk adjust this later, as long as they are consistent.
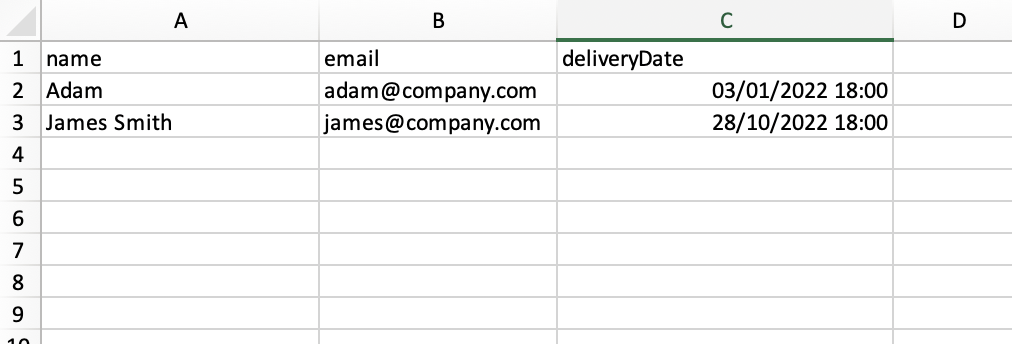
Once complete, save your file as a CSV or excel file then upload it on our website.
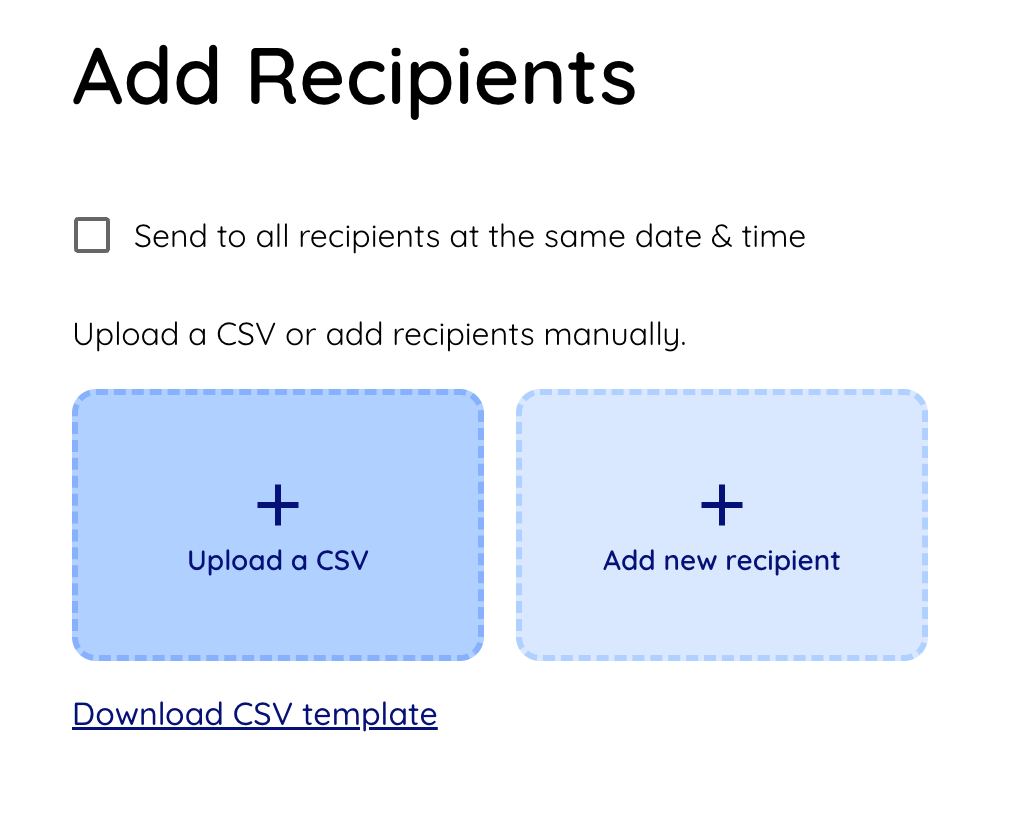
You can also manually add recipients or edit them
5. Decide when to send
You can choose if you want to send to everyone at the same date and time, or if they should be sent at individual times.
Same Time:
This is great for Christmas Cards, Specific Events
Different Times
Use this for Birthday Cards and Work Anniversary Cards when these dates are different for everyone

6. Review and Send
Review the card by previewing it as certain recipients on the confirm page.
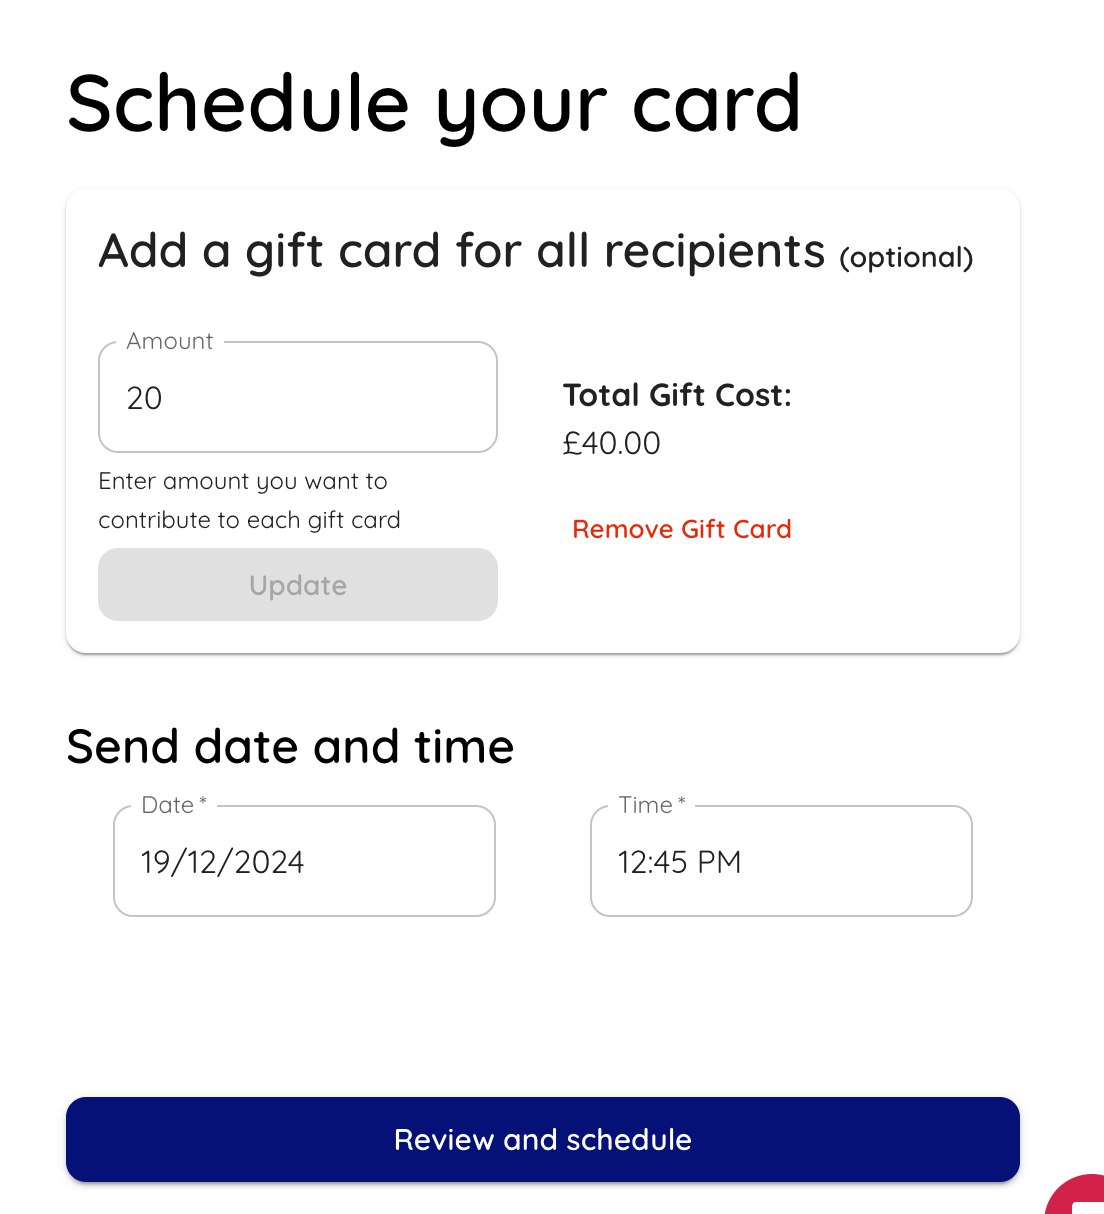
Add a Gift Card
If you haven't already, you can add a gift card to the card and allocate an amount to each, e.g. £20
Set a send date and time
If you checked the option to send to everyone at the same time, you can enter the delivery time. If not, we will automatically sent your card on the set date on the recipients page. In this case we will generate your card 2 weeks before the delivery so you can collect more messages from others by sending out the link before it is delivered.
How to send
If you are sending greeting cards you will need to purchase a bundle for at least the number of cards you are sending if you haven't already.
If you are sending gift cards, you'll need to top up your float to at least the required balance.
Click Review and schedule and confirm.
7. What now
There are different options depending on what options you chose
- Send cards at the same date/time
We will create all your cards immediately and deliver them on the date you specified. You will have all the individual links to each card which you can make changes to individually if you like. - Send at scheduled date per recipient
We will only create cards 2 weeks before the scheduled date (you can adjust this). You can then use the link to collect more messages to make edits before the card gets sent.
Using this option will also allow you to make changes to the template card and add or remove recipients. All changes will only affect future cards (ones that are at least 2 weeks away which haven't been created)